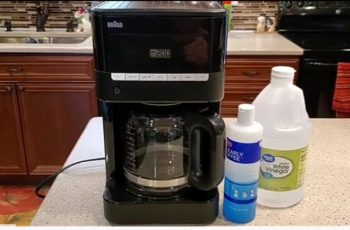
Do you feel your coffee is bitter?
It is time to clean your coffee maker! It would help if you gave coffee buildup with this quick and easy method discussed that will let you know how to clean a coffee maker and carafe with the help of vinegar and water.
Cleansing Of A Coffee Maker
After the coffee maker cleansing, you can enjoy a delicious, fresh cup of coffee!
You might think that your coffee maker is clean. But often, you should notice some of the warning signs that indicate that your coffee maker is not clean enough to produce clear coffee.
The signs include:
- Oily sludge and mineral buildup that forms eventually on your coffee maker and pot,
- If it creates stains,
- If it produces a bitter-tasting brew.
There can be germs and bacteria which are not visible, and that’s a big problem indeed. It has been studied that coffee makers are known to be the fifth germiest place at home.
How Often Should I Clean My Coffee Maker
It is recommended to clean your coffee maker after every use, and this will help remove the grounds left behind and help clean the brew basket, lid, and carafe. If you want deep to clean your coffee maker by descaling mineral deposits, this process must be done every three months.
Steps How Often Should I Clean My Coffee Maker
With the help of few steps, you may quickly learn to clean your coffee maker with vinegar and water.
It is also easy to descale a coffee maker with the same materials by just a slightly different process. It does not matter which type of coffee maker you have, and you just need to give some time to allow the vinegar to work, so do it the right way!
How to Clean a Coffee Maker
It is not complicated to clean a coffee maker, just by using a distilled white vinegar and water, you can easily clean Keurig coffee maker.
What You Need To Clean A Coffee Maker
- coffee maker
- Dish liquid detergent
- Towel
- White distilled vinegar
- Water
- Empty mug
Step 1: Wash The Exterior Of Coffee Maker
Before descaling your coffee maker, you need to clean the exterior of the coffee maker by scrubbing. You can take out the drip tray, cover, reservoir, and holder and wash it in the dishwasher. Place it in the sink filled with hot water and a liquid cleaning detergent. Keep it soaked for few minutes, rinse well and then dry it!
Step 2: Clean Interior Of The Coffee Maker
After cleaning the exterior of the coffee maker, take a clean toothbrush and gently brush in to remove any coffee grinds in the K-cup holder. You can also use a damp cloth that can be helpful in removing any of the buildup. Keep in mind to clean the exterior as well as interiors after every use.
If you find any of the limescale deposits, you just need to soak that part in white vinegar, apply it to the area that is affected and keep it soak for some time. Wash it again and you will see the difference.
Step 3: Run Vinegar Solution to Clean The Coffee Maker
Make it sure that the coffee maker has no pods in it. Keep a large empty mug, empty the water if present. Now remove the water filter if there is any. Allow the vinegar solution to run through the coffee maker as many times as it takes for add water to come on! Dump out the liquid from the mug in to the sink after each brew.
Step 4: Rinse The Reservoir
After following all the steps, let the coffee maker sit for at least 30 minutes. When it is done, take out the reservoir and clean it with water and let the vinegar residue vanish. Rinse it thoroughly.
Step 5: Run With Water
Rinse again properly with water so that the coffee maker gets free from vinegar. You can use the largest cup setting and that helps to allow the water to run through the coffee maker as many times possible. Clean and dry it in order to make it ready for the next morning brew!
Step 6: Using a Descaling Solution (Optional)
If you feel that the taste is not improving of the coffee made by the coffee maker, then you should repeat the process with a manufacturer-approved descaling solution. If we talk about Keurig, so they recommend descaling for every 3 to 6 months for better results.
Tips That Help to Keep Your Coffee Maker Cleaner For Longer
- You must use demineralized water when brewing coffee.
- Wash the carafe always with hot and soapy water.
- Do not leave any part of the coffee maker wet, or do not leave the coffee grounds in the maker for hours, this might result in growing of yeast, mold or even bacteria.
- Pay attention if your coffee maker needs a thorough, detailed cleaning that will be helpful in removing trapped coffee residue that clean the brewer.
Final Verdict
Cleaning a coffee maker is essential that helps to prepare a tasty cup of coffee. If you pay attention to it cleaning, you will get the best coffee every time.
A clean coffee maker will also function the way it should be. It will make sure to give you your desired cup of coffee every time. So it is better to clean it often in order to get best results!


