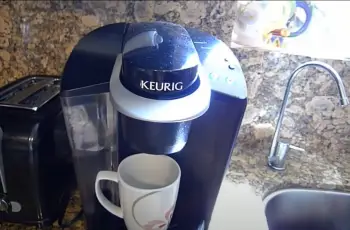
The Process Of How To Unclog A Keurig Coffee Maker
A Keurig coffee maker is a popular brand of coffee maker, and it is well known for its excellent performance, which has been established over the years. It brews coffee efficiently and within a short frame of time. Which is one of the many reasons why it is loved by a lot of many people. Though it is an excellent product, it does not mean it does not have its drawbacks which are issues that owners of a Keurig coffee maker have. One of these issues is that the tube easily gets clogged, and coffee flow is impaired. This keeps users wondering how to unclog a Keurig coffee maker. The needles of every Keurig coffee maker can easily get clogged, especially if it is used daily. This post will cover how to unclog a Keurig coffee maker without a lot of stress. The process of unclogging every model of Keurig coffee makers is quite easy and it is the same for every Keurig model. So you don’t have to worry that this process might not apply to the model you own. Just follow the post step by step, and you’ll get your coffee maker unclogged in no time.
What You Will Need
To unclog a Keurig coffee maker, you will need a few things which are easily accessible. You will need;
- A clean metal paper clip. This is what you will use to loosen the particles blocking your Keurig. One end of the metal paper clip will be straightened to allow easy access to the tubing.
- A large ceramic mug. You will use this to receive water coming from the coffee maker. At some point during the process, you will have to run a water-only cycle.
- Access to a sink. During the process, you will need to wash some parts of the coffee maker. So it would be best if you’re close to a sink. Let’s begin.
How Do I Prevent My Coffee Maker From Getting Clogged
You can prevent your coffee maker from getting clogged by cleaning it always. Your coffee maker should be cleaned after every use, to prevent particles from building up in it. Make intentional efforts to keep it clean. And, you shouldn’t wait till when it is completely clogged before you will take your coffee maker through the unclogging process
Steps On How To Unclog A Keurig Coffee Maker
Before you begin, make sure your Keurig coffee maker is turned off, and unplugged. It is not a process that you need electricity for, so there is no need to leave your coffee maker plugged in. If you’ve done that, let’s get ahead to the steps.
- Remove the potholder from the brewer. You can do that by lifting the coffee maker handle and grasping the top of the potholder firmly with one hand, then push up the bottom of the potholder with your other hand, and it will get released. It might require a little bit of force, especially it is your first time getting the potholder detached.
- Next, you will go ahead to remove the funnel from the potholder. You can do this by pulling the potholder by the sides until it detaches. You will then locate the tube on the underside of the potholder. That’s is where you need to unclog.
- Get your metal paper clip, and straighten out one side. Insert into the tubing and move in a circular motion to release the stuck-in particles. Do this repeatedly until the tube is free of all particles. You can look through it to be sure. Wash the coffee pot and funnel at the sink, under running water to remove any particle that is left on it. Dry the funnel and pot holder.
- You’ll go ahead to clean the exit needle, which is sharp so you have to be careful so you don’t get yourself injured in the process. Lift the brewer handle to locate the entrance needle under the brewer’s head. They appear as two holes, just look closely and you will find them. Carefully insert the straightened edge of the metal paper clip into the holes. Follow the same process as cleaning the tube to remove all deposited particles. Once you are satisfied that you got all the particles out, safely remove the metal paper clip. Again, you can get injured, so you have to be careful with your hands.
- The next step is to place the potholder back in its position in the brewer. Before that, make sure you put the funnel back into the potholder by aligning the side slides. Put the potholder in place by pushing the top rim down, and holding your brewer handle with the other hand.
- Place the large ceramic mug on the drip tray. Run two water-only brew cycles using the largest cup size. You do not need a cup at this point. Just water. Allow the water to drip into the mug, then you can discard it. After that, your Coffee maker is ready for use and will work as efficiently as it ever did. Pretty easy.
Conclusion
A little clog in your Keurig coffee maker is not alarming, and as a matter of fact, it is very common with Keurig coffee makers. So when your coffee maker gets clogged, it is nothing out of the ordinary. You would expect a coffee maker that works daily to hold some particles. The steps to unclogging it are easy, and will only take you about ten minutes to complete. If after this process, your Keurig coffee maker still does not work efficiently, maybe there’s a fault somewhere, and you will need to contact Keurig’s help and support team, to know the next step. Your Keurig coffee maker is a kitchen treasure so as much as possible, try your best to keep it in a good shape. These best efforts include getting it unclogged when there is a need to and getting it cleaned when it is due for a cleaning. Enjoy good coffee with your Keurig.


