Does your coffee taste off, but you’re not sure why? Chances are you aren’t measuring your coffee properly. But how exactly do you measure the perfect coffee to water ratio? Stay tuned to find out.
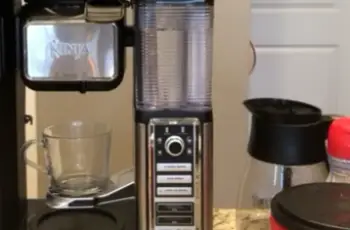
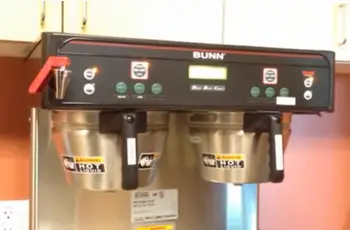
When you measure coffee grounds take notice that some drip coffee makers are preset to 1 cup of coffee equals 5 ounces of water. For example, the Cuisinart models in the above photo have this ratio. Other drip coffee makers say that 1 cup of coffee equals 6 ounces of water.
Coffee is personal – the right way to make it is how you like it best. That being said, mastering a few fundamentals will help you perfect your technique. From here, we encourage you to experiment with different roasts, origins, or preparation methods.
Coffee To Water Ratio Calculator
Before we get into the 17:1 ratio vs. 15:1 ratio and how to measure coffee for French press vs. drip coffee and so much more, here’s a quick calculator we created to make the process really simple. Since most people are using a standard drip coffee maker and aren’t great at coffee math, we created a tool to help you out.
Why Measuring Matters
In order to make a consistent cup of coffee each and every time, it’s important to develop the habit of accurate measurement. To do that, there’s no substitute for a small kitchen scale that measures in grams. With it, you can measure water, beans, and grounds.
Our preferred ratio of water to coffee beans is 500 grams (or milliliters) of water to 30 grams of whole coffee beans. Feel free to experiment, but this produces the closest thing to a universally acceptable coffee strength.
Measure The Water
Put your empty, cool kettle on the scale and hit the tare button. This resets the scale to zero so that you’ll only measure what you put in the kettle. Then, slowly add water to the kettle until it reaches 355 grams. Once you hit the mark, set the kettle aside. Tip: If you’re planning on boiling water, you can add a little more to compensate for water evaporation.
Measure The Beans
Reset your scale and find a clean bowl or container to place on top for your grounds. Hit the tare button to set things back to zero. Next, either scoop beans into your container until you reach 21 grams. If you are using whole beans and grinding them fresh, you can measure weight with the whole beans before grinding them.
Brew Time
Now that you have the perfect amount of water and coffee, it’s time to start brewing. Add your grounds to your drip brewer‘s filter and pour the water into the reservoir.
Adjusting The Servings
That wasn’t so bad, right? The part that intimidates most people is determining how much coffee and water to use based on their desired servings.
Because of this, brewing without an automatic drip can be daunting. Especially for those of us less mathematically inclined, nailing the coffee to water ratio can be deceptively troublesome. However, there’s no need for guesswork and mediocre coffee anymore.
For reference, you can check out this great chart as a starting point, and adjust the ratios to your liking as you brew on into the future. This one roughly follows the 1:17 rule, but you can increase or decrease how many grounds you use for brewing to achieve higher or lower intensities.
However, you should not, decrease or increase the water component as you adjust. Stick to the appropriate amount of water for your brew size and change the amount of coffee you are using instead. That way, you aren’t actually affecting how much coffee is brewed, just how it tastes.
Need More Power
With drip brewers, adding extra grounds to adjust your coffee to water ratio works to strengthen your brew to an extent. 1:15 to 1:18 is considered the “golden ratio;” however, we used about a 1:17 ratio because it falls around a nice mid-level of intensity. We wouldn’t really recommend going past 1:15 though because there really can be too much of a good thing.
If you add too many grounds for the amount of water you’re using, your coffee will feel muddy or heavy. Also, it probably won’t taste much stronger than a more appropriate amount would. So save your grounds and your money and don’t overdo it.
For those of you who have reached the upper limit, it may be time to invest in a darker roast or a different brewing tool altogether. Drip brewers can only do so much, and if you’re craving a straight shot of espresso, they just aren’t going to cut it.
Trying to Avoid Heart Palpitations
On the other end of things, you can go up to a 1:18 and possibly slightly past that, though not much. This will make a lighter, weaker coffee that is better enjoyed with minimal additions. Like with strengthening your brew at the lower end of the radio spectrum, having too little grounds can also have problems. Not only will your coffee taste weak, it may also be over-extracted. If that is the case, your coffee will taste incredibly bitter. No one wants that!
Others Brewing Methods
With the Third Wave of coffee brewing in full force, there’s a good chance you’re brewing with something other than an automatic drip brewer. So below, we have a handy breakdown of how you should be measuring your coffee for each of the most popular brewing methods.
Keep in mind though that these are mostly just rules of thumb. As we mentioned before, changing up the coffee to water ratio is also how you change the strength of your brew. So think of these recommendations as a place to start your experimentation until you land on the combination that’s best for you! Pro Tip: You can use the water amount per serving guidelines above for these other brewing methods as well. Just change up how much coffee you’re using.
Cold Brew
Let’s start with cold brew, the perfectly refreshing, laid-back summer drink. Keep in mind that this type of brewing creates a concentrate, rather than a finished brew. So later down the line, it will be diluted with more water, so don’t start having heart palpitations over our suggested ratios.
If you’re new to the brew, try starting with a 1:8 coffee to water ratio. This should give you a nice, mid-level strength intensity that’s suitable for most. For those of you who already know you’re going to want something stronger, try starting at 1:5.
Moving on to how to dilute it, this stage is equally dependent on your tastes, so remember to mix it up for each cup throughout your first batch. You should dilute the coffee concentrate as you drink it rather than in the carafe all at once.
You should start with a 1:2 ratio of coffee to dilute with ice. If you aren’t an ice fan, just add a bit more water. Taste the brew and go from there, tweaking the dilution or brew ratio as needed.
Final Thoughts
Different methods and preferences will call for different measurements. Your journey down the Path of the Bean will yield a variety of approaches, so feel free to experiment. In the end, only you can decide what’s best for your cup.
Prepared coffee begins to lose its optimal taste moments after brewing, so only make as much coffee as you’ll drink. Otherwise, coffee can be poured into a warmed, insulated thermos to be consumed within an hour.
(Don’t worry – old coffee probably isn’t dangerous, just not very appealing. Always use your best judgment before ingesting anything, no matter what you read on the Internet.) Try to enjoy your coffee as thoughtfully as it was prepared – take in the aroma, and notice the flavors in each sip. Many people have been instrumental in bringing it to your cup.


