Coffee is the world’s favorite day starter. A nice caffeine boost to get you fired up and ready for the day is never a bad idea. When it comes time to pick which method you are going to use to brew your coffee daily, you have tons of options.
However, with using paper filters, the options become more limited. A paper filter coffee maker is one of the most commonly used options to brew coffee around the world. It’s also what we are going to take the time to discuss and break down for you in this post. Let’s dive into some of the benefits of using a paper filter coffee maker and give you a step-by-step guide to ensuring you create the best possible cup of coffee you can.
You have to start somewhere and the classic automatic drip coffee maker is a great place for beginners (or coffee drinkers of any skill level). A go-to for good reason, drip machine brewing is consistent, easy, and versatile enough to work with any coffee you like. But don’t confuse simple for basic — you can expect really good coffee, easily on par with most manual methods.
The secret’s in the right grind, proper cleaning, and filtered water. And while this recipe is specifically for a 10-cup coffee maker, you can easily adjust it for different amounts of coffee. Simply divide the water volume and coffee weight by the same number (E.g. 625 milliliters of water to 40 grams of coffee). Read on and learn how to use a coffee maker to its fullest potential.
Why Should You Use Paper Filter Coffee Makers – What Are The Benefits?
Why should we use paper filters when brewing coffee? Do we gain any substantial benefits in doing so? Some would say yes, you do gain significant benefits when using a paper filter during the brewing process with coffee. First, the paper filters help block oily substances. These are known as diterpenes. Diterpenes come in 2 commonly known variations.
How To Use Filter Coffee Maker
The Standard Coffee Maker Method
Using a standard coffee maker is the most universally used method for brewing coffee. Standard coffee makers aren’t only affordable, but they are sold in nearly every brick and mortar store across the world. They are cheap and for the most part, straightforward to learn and brew coffee in a fast fashion. Let’s break down the steps from start to finish for brewing a cup of coffee using this method.
Step #1- Purchase and Plug It In- Get Familiar With Your Coffee Maker.
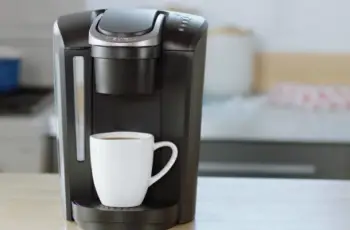
First and foremost, you are going to need to purchase a standard paper filter coffee maker like this. You can find them almost anywhere including Amazon for relatively cheap. Once it has arrived, read over the instructions and get the coffee maker plugged into the wall or a standard wall outlet.
Step #2- Fill Your Water Tank/ Reservoir and Get Ready for The Brew.
Nearly all standard paper filter coffee makers will have a tank or water reservoir of some sort. Before beginning, you need to fill the water tank/reservoir. Your primary goal with this is to fill it to the desired level or “number of cups” you intend on having. These water tanks will be labeled on one side with the number of cups and “fill lines.”
You can watch as you fill it with water and fill it to the desired level. If you intend on drinking coffee throughout the day, you may want to fill the tank to the fullest level. For the cost of grinds and filters, it’s not going to break the bank to waste a cup or two if it ends up not being consumed during the day. You should always use clean filtered water if you are looking for the best overall taste. Also, filtered water will help eliminate mineral deposits building up or damaging the coffee maker over time.
Step #3- Put the Filter To Work or Insert Your Paper Filter into The Filter Pull Out Compartment.
Your coffee maker will come with a flat-bottomed plastic compartment designed for you to place your filter inside. In most circumstances, it will be located on the top of the coffee maker and you usually either lift it open from the top or slide it out towards you. Locate and open this compartment.
This is when you can insert your paper filter. (These compartments will also allow for the reusable, washable mesh filters). For the sake of this post, we are only focused on the benefits and uses of paper filters. When inserting the paper filter, make sure it is large enough to fit into the slide-out or compartment. It’s also advisable to always wash and clean the holding compartment after each use to ensure you don’t cause buildup or other issues with the coffee maker over time.
Step #4- Begin Measuring Out the Coffee Grinds
Now it’s time to measure out the coffee. For some of us or the individuals who have been using this method for a long time, it becomes more of a “number of scoops” method compared to measuring out the grinds in an exact fashion. However, for the beginner, a good starting point would be 1 large scoop of grinds per 5 ounces of water. Adjusting this ratio will determine the overall strength of your coffee. More grinds will create a stronger brew and fewer grinds will produce a weaker brew.
Step #5- Fire Up the Machine and Begin the Brewing Process
At this stage of the process, your almost ready to enjoy a nice cup of coffee. All you need to do is start the machine (after making sure it’s plugged in). The coffee will begin dripping into your empty coffee pot below after the grinds are extracted through heat.
Once the desired number of cups has been dripped into the pot, you can turn the coffee maker off or place the coffee on a timer to shut off at the desired time.
Step #6- Be Sure to Shut Down the Coffee Maker After You Are Finished.
Once your brew is complete, you need to be sure to shut off the coffee maker. Leaving it on with no coffee left in the pot or even a small amount of coffee left in the pot could result in the bottom of the pot burning. This will create an odor in the home and be a tedious task to clean up if the coffee maker is left on.
The charred coffee pot bottom will take a scrub brush, hot water, and soap to get the film and burn marks to clean off thoroughly. If this doesn’t work, you can always try using a household degreaser to remove the burned bottom.
Step #7- The Final Step- Clean Up, and Regular Maintenance is Crucial.
Once your fully finished brewing, pouring, and drinking your coffee, it’s important always to clean your coffee maker and the critical parts involved. Clean and rinse your coffee pot. Remove and discard the used filter and grinds and double-check no grinds are clogging any drip/drain areas of the pot.
Give it a gentle wipe down, shut it down and have it ready for your next brew tomorrow.


