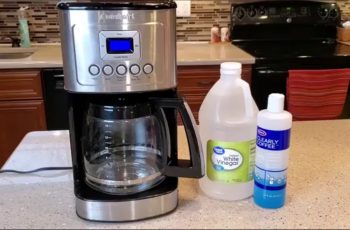
Cuisinart stands as one of the most dependable makers of kitchen gadgets on the market today. Besides their other items, Cuisinart also offers a wide selection of coffee machines. This article will focus on the procedure for disassembling a Cuisinart Coffee Maker.
You may want to dissemble the coffee maker for giving a thorough clean. Sometimes you may require dissembling it for troubleshooting and solving issues like leaking. Well, taking apart a coffee maker is not something easy. There are a lot of components inside the machine which you need to be aware of.
Below, you will find step by step discussion on how to take apart the Cuisinart Coffee Maker. Keep reading the article with proper concentration to understand how to do this accurately.
How to Take Apart a Cuisinart Coffee Maker
Taking a Cuisinart Coffee Maker coffee maker is going to be a bit though. Before you begin, make sure that you got everything to make the step successful. You will need a size 3 flat precision screwdriver, needle nose pliers, wire nipper, and cordless drills. You may also require the high-temperature silicone tubing for repairing. Now follow the instructions precisely:
Before You Begin
You need to do some works before start taking apart the device. The first thing we will recommend you to do is to unplug the coffee maker. This is very important as you can end up getting shocks from electricity if you open the device without disconnecting. The next thing you need to empty the water tank of the device. Simply, put the machine upside down to remove the water from it.
Get Rid of the Removable Parts
The first thing you need to do is to remove all the detachable parts from the coffee maker. Such as, some of the coffee makers allows the user to remove the water reservoir easily. If your air fryer allows you to do this, do it. Besides, some of the coffee makers allow you to remove the lid easily. Try grabbing the lid of the coffee maker with your fingertip and lift it up. Put it aside if it comes along. Don’t put much force as it can damage the device.
Removing the Back
Now we will work on removing the bottom plane of the coffee maker. To do this, lay down the coffee maker to access the back. Now find the screws which should be located in the four corners of the back. Note that there will be rubber feet that don’t require removing. Simply remove the screws using a compatible screwdriver. Typically, the screws are Torx-10 headed screws with a pin that holds them firm.
Make sure to use the right screwdriver for this work. Else, you may end up damaging the screws. Typically, a 3mm precision flat-tip screwdriver should work best for this. You might also try with other flat-tip screwdrivers with smaller bits. After removing the four screws, you can slip the flat-head screwdriver in the edge to take out the bottom cover. Store the screws along with the cover aside.
Removing the Hose
After removing the bottom cover, you can see the aluminum heating element along with the rubber tubes. Now if you want to remove the wire hose clamp, you can do it easily. Simply squeeze it and it should come out. If you are finding the reason for the leakage, you may see a hole or break in the hose. You can remove the hose and replace it. Make sure to use the same variation and same size of the hose.
If you are replacing the hose, make sure that you are using a high-temperature and food-grade hose. Using a low-grade hose is not only bad for your health, it can also affect the coffee taste.
Removing the Tank
The main water tank inside the machine should be visible once you open the machine. However, it can be a bit critical to remove all the parts and access the tank. Besides, based on the machine you have, the procedure can also be different. So, make sure that you are doing this part carefully.
At first, you need to remove the hoses. There might be some power cables that go up to the tank from the circuit. You also need to cut the cables. Make sure to mark the cables before cutting to easily put them back together.
Resembling the Machine
If you have removed the tank, make sure to put it back as it was. Then reconnect the wires properly. After that, you should put on the hose clamp. Make sure that is tightly squeezing once you have put it back. Make sure that you are not using any tools to squeeze it as it can damage the hose. After that, position the hose clamp in the middle of the hose. Before putting back the cover, make sure that you have reassembled everything properly.
Now it is time to put back the back. Begin with putting the cover on its compartment. Then put back the screws and tighten them. Use the same screwdriver you have used while opening the coffee maker. Once you are done, you should put it upright. Now you can put back the lid of the coffee maker. It should be secured in its place with a little pressure.
What to Do If You Cannot Dissemble It?
If you failed to disassemble the machine, it would be best if you leave it to the professional. Based on the model of the machine you are using; the dissembling procedure may not serve you well. So, if you fail, make sure to go to an expert. He can also help you with solving the issue of the machine. You can make the condition worse by trying to fix a malfunctioned coffee maker without any prior experience.
Conclusion
Cuisinart Coffee Maker can be a great and long-term companion for you if you take proper care of it. In case of any issues, you can call the customer support of the brand to solve the problem. If the coffee maker is not under warranty coverage, you can take it to a local technician to fix it.


