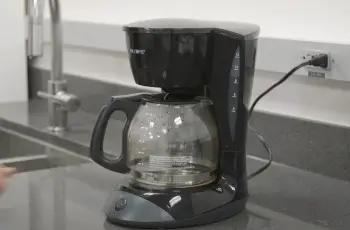
For those who are passionate about coffee, the idea of starting a day without the essential, richly aromatic cup of freshly brewed coffee is unthinkable. Moreover, it’s hard to imagine not having a coffee maker at home, especially the Keurig, renowned for being the perfect ally for when you desire a quick cup of coffee without delay.
You probably know why it brews so fast. It does because it has the feature to store about a cup of water in its interior. If you want your Keurig coffee maker to be in the best working condition for the longest of the period, you would need to flush out the water from its interior and also from its reservoir as well time by time.
Ways To Empty The Water Out Of A Keurig Coffee Maker
Here we will tell you how can you drain off the water from the interior of your Keurig coffee maker since it does not come with a drain plug.
There are possibly two ways to flush off the water from your Keurig coffee maker.
Either by tricking it into brewing a cup of hot water or by disassembling the coffee maker using a manual guide.
Method 1: Drain Off The Water Without Disassembling
Using this method, you can trick your Keurig coffee maker into brewing a cup of hot water.
Step 1: Empty The Water Reservoir
Flush out the water from the water reservoir of your coffee maker.
Step 2: The Float In The Water Reservoir Needs To Be Altered
When you remove the water from the external reservoir, you will notice a metal disk inside. You will find it near the bottom of the water reservoir. Slide the disk to the top of its track. Replace the water reservoir with a full one and give it a slight push to let it stay there. Now, the coffee maker would work the same way as it does when the reservoir is full.
Step 3: Push The Brew Button
Pour some water into the cup and press Brew. You do not need to put a coffee cartridge in and, it is probably best if you do not put it in. Also, you can use this water in making coffee.
Step 4: The LED Prime Message
As the brewing process completes, It will ask you to add water. Now, this is the time when you have to remove the reservoir. Also, reset the float and for one more time, press the brewing button. As the coffee maker completes the second brew, there will be a message on display: Prime. The interior of your Keurig coffee maker is now empty.
Method 2: Drain Off The Water By Disassembling
To drain out the water from the interior by disassembling might not be anyone’s cup of tea. For this method, you would need to read and learn the manual thoroughly. There you will not find any procedure of disassembling, but the details of the parts of the coffee maker.
Step 1: Thoroughly Read The Manual
You can determine if you need to remove the bottom panel or the side panel to reach the drain hose if you check the Keurig manual for its location. Then, quickly separate the hose once you locate its place by removing the bottom or side panel.
Step 2: Disconnect The Bottom Or The Side Panel
Before doing anything, let your Keurig cool off by unplugging it first. The coffee maker must cool down for at least 30 minutes before it using it again. It will also allow the hot water container to cool down. While emptying the container, this will help keep you from accidentally getting yourself burned.
Step 3:Detach The Hose
There is a white plastic tube embedded inside the body of the Keurig coffee maker. You can pull it off its fitting. If it is attached to a cable tie, cut it with a knife. Make sure you have an extra cable tie on hand to reattach it when you have done it.
Step 4: Let The Water Drain Off
Let the water drain slowly by placing the end of the drain hose in a cup or setting the cup under the drain opening. Remain patient while the water drains.
Step 5: Reattach The Hose And The Panel
The hose should be re-inserted into the fitting once the tank drains. The tie should be attached if it is needed. You should check the manual for instructions on how to reassemble the panel.
The Final Verdict
To ensure the long-working life period of your Keurig coffee maker, you need to drain your Keurig water tank now and then. Specifically before travelling and taking it with you, moving it, shipping it, or if you are planning on putting it up for a long time.


