Are you encountering difficulties when trying to make a cup of coffee with your coffee brewer? Do you find your cup only half full when you were anticipating it to be completely filled? Have you observed any unwanted grounds or particles in your coffee? Additionally, have you noticed any buildup of minerals on your coffee brewer? If you’ve witnessed any of these issues, then it’s time to clean your Keurig coffee brewer.
Perhaps you are considering how to execute the task properly and efficiently. Here is a guide for cleaning and descaling your Keurig coffee maker with CLR. Our quick cleaning guide will show you how to get your coffee maker clean and efficient in no time.
What Are The Toxic Effects Of CLR
Calcium, Lime, and Rust Remover are called CLR. The product is non-toxic, water-soluble, and biodegradable. The products are made from vegetable chemicals, however, all safety precautions should be adhered to according to the instructions on the bottle. Older sinks, tubs, and tiles may be damaged by CLR. Corrosive chemicals are used in CLR.
CLR And Coffee Makers
If your coffee maker holds water permanently, do not use CLR. CLR should never be used in espresso machines. For Keurig coffee makers, CLR is not recommended. If you still want to use CLR in your Keruig coffee maker, read down our quick cleaning guide:
Step 1. Shut Off And Unplug Your Coffee Maker
Before you proceed, make sure the coffee maker is completely turned off and unplugged.
Step 2. Clean Up The Exterior
Wash any coffee drips or stains off the coffee maker’s exterior with a dishcloth or sponge dipped in warm, soapy water.
Step 3. Clean The Drip Tray
Remove the drip tray then clean it in the sink with a sponge and soap. Every edge of the screen needs to be cleaned because coffee drips may accumulate there.
Step 4. Clean The Needle On Your Keurig
Coffee grounds can accumulate in the needle, preventing it from flowing and possibly growing mold. With a paper clip or safety pin, you can perform manual cleaning, or you can use a brewer maintenance kit from Keurig that comes with a rinse pod.
Step 5. Run A Descaling Cycle With CLR
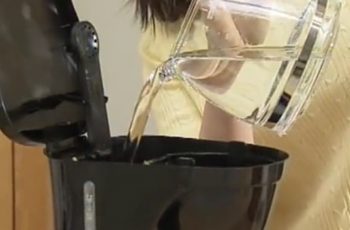
Start your coffee maker by plugging it in. Fill the water reservoir for automatic drip coffee makers with a 10- to 12-cup capacity, mix one part of 1 cup CLR with eight parts of 8 cups water. Put the mug below the brew head and push the brew button.
Step 6. Discard The Solution
After the brew cycle is completed, throw away the solution.
Step 7. Run Couple Of Cycles With Water
Place the brew head under the cup and fill the reservoir with water. Press the brew button. Make sure you repeat these couple of times so that you won’t taste any lingering CLR flavor in your next cup of coffee.
Step 8. Let The Coffee Maker Cool Down
For about 30 minutes after cleaning the inside of the coffee maker, unplug it again to allow it to cool down.
Step 9. Your Keurig Is Clean, So Use It!
The job is done! Now that you have cleaned the coffee maker, you should be able to use it the next time you brew coffee.
The Need Of Cleaning The Keurig Coffee Maker
Despite the fact they are simple, convenient to use, Keurig coffee makers aren’t going to last much longer without proper maintenance. You can get minerals from the water you use for your Keurig coffee maker as well as oils from the coffee as it works. As a result of mold or bacteria growing inside your coffee maker, the needle can become clogged, preventing the coffee maker from brewing properly. It is likely that if you have hard water that you will need to descale your coffee maker more often.
Tips For Maintaining Your Keurig Coffee Maker
1) It is important to wear rubber gloves to protect yourself. Rinsing away the cleaner will likely expose you to CLR particles. Skin can be affected by these harsh chemicals.
2) After you have brewed a few cups of coffee, pour some plain water into a mug and run it through the coffee maker. By doing this, any leftover materials from the filter area will be washed away before they can be used again.
3) Consider using filtered water instead of tap water if your Keurig coffee maker needs cleaning more frequently than is recommended.
4) Before leaving for a trip or not using your Keurig coffee maker for a prolonged period, empty the reservoir and switch it off.
Conclusion
With Keurig’s coffee maker, you can make yummy coffee at the push of a button. Cleaning your Keurig coffee maker isn’t the most fun, but it keeps it going and is pretty simple. Hopefully, this guide helped you to get a fresh cup of coffee again by cleaning your coffee maker correctly!


