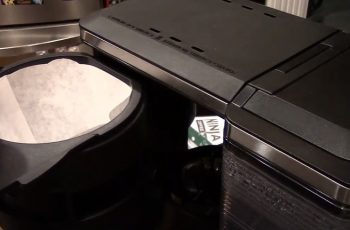
Currently, Cuisinart and Keurig offer a range of highly favored coffee machines. It’s likely that many of you are already familiar with their user-friendly operation and the diverse array of tasty drinks they can produce.
Both Cuisinart and Keurig must be descaled every three to six months to maintain their top quality and performance. Both of these recommended a descaling solution, but we think it would be more cost-effective to choose a more basic descale.
Descaling My Cuisinart Keurig Coffee Maker
In this, we will go over each of the descaling processes on the Cuisinart and Keurig coffee makers separately so you can keep your brewing coffee that tastes as good as the day you bought it.
What Is Decalcification
Decalcification of the brewer is also vital since it removes any coffee oil build-up and decalcifies the system. The process of decalcification is used to remove calcium and other deposits accumulated over time from the metal components of the coffee maker. Is your coffee maker taking longer to brew than usual? Your coffee maker may be calcifying.
Cuisinart Coffee Maker – Descaling Process
If the Clean light illuminates when switching on your Cuisinart coffee maker, calcium accumulation is interfering with its functioning and impacting the quality of the coffee.
Step 1: You should remove the charcoal water filter from the holder in your coffee maker’s water reservoir before decalcifying it.
Step 2: Prepare a mixture of ⅛ white vinegar and ⅔ fresh water and pour it into the water reservoir.
Step 3: Select the Clean button to clean. Push the ON/OFF button on the Cuisinart coffee maker when the Self-clean light appears. You will see the Clean light flashing constantly. The coffee maker is now set to Clean mode.
Usually, a single cycle will be sufficient to thoroughly clean the Cuisinart coffee maker. The Cuisinart coffee maker will turn off after five beeps are heard at the end of the cycle.
Step 4: After turning on the Cuisinart coffee maker, check if the Clean light is still on. You should turn it off and start cleaning with a new vinegar and water solution again.
Step 5: When the Clean light no longer appears, turn off the Cuisinart coffee maker and run a fresh cycle of cold water through it before brewing more coffee.
Cuisinart coffee makers need regular decalcification for best performance. You will need to decalcify your Cuisinart coffee maker frequently based on two factors: the hardness of the water and the frequency with which you use it. When it is time to clean your Cuisinart coffee maker, an indicator light will blink.
Keurig Coffee Maker – Descaling Process
Depending on how often you use your Keurig coffee maker, you should descale it every three to six months for a deeper clean. To ensure that your coffee maker stays working at its best, remove any calcium deposits inside it through this process
Step 1. Add Keurig Descaling solution/pouch to an empty water reservoir
Step 2. Now fill the same empty bottle with water and pour it into the reservoir as well.
Step 3. On the drip tray, put a large mug. Make sure the K-Cup is not inserted and the K-Cup pod holder is empty.
Step 4. The way you activate Descale mode will depend on the model of your Keurig coffee maker. but for the K-Duo model, you do this by pressing OZ/POD, selecting the 12 buttons, and press BREW to perform a cleansing brew.
Step 5. Place the carafe on the heating plate, select CUP/CARAFE, and brew a cleansing cup by choosing the 12 button and pressing ‘BREW’.
Step 6. Turn off the brewer or heating plate and empty the carafe.
Step 7. Allow the brewer to rest for 30 minutes.
Step 8. To thoroughly rinse the reservoir, fill it with fresh water up to the top of the ‘MAX’ line.
Step 9. In the same manner as before, place an empty carafe on the heating plate, press CUPS/CARAFE, and then select the 12 button and press ‘BREW’.
Step 10. Press and hold the red CUPS/CARAFE button until the red light is off to turn off the heating plate.
Step 11. Again, fill the water reservoir to the MAX fill line and repeat step #9 three more times.
Step 12. The reservoir should be filled all the way up to the ‘MAX’ fill line.
Step 13. Select the 12 button and press the brew cycle to perform the cleansing brew. Place a large mug on the drip tray, press the OZ/POD button, and press the brew cycle to perform the cleansing brew.
Step 14. Continue by repeating step #13 three more times.
Conclusion
As you can see, cleaning your favourite coffee maker is quite a simple procedure. We hope you find these instructions on how to descale your Keurig and Cuisinart coffee makers helpful in keeping them working properly. You can always enjoy fresh and delicious morning coffee by simply following our descaling instructions.


