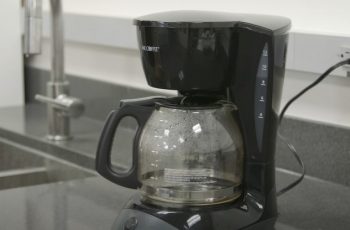
Black and Decker stands out as a prominent coffee maker brand in today’s market. They offer an extensive range of models, each equipped with diverse features. Wondering about the best way to clean your Black and Decker Coffee Maker? You’ve come to the perfect spot. Maintaining cleanliness in your coffee maker is crucial for optimal performance.
Below, we will discuss how to clean the Black and Decker Coffee Maker. Keep reading the paragraphs to find out the step by cleaning procedure along with related information.
Why it’s Important to Keep the Coffee Maker Clean?
Coffee is something like a source of energy for some of us. Leaving your coffee machine uncleaned can eventually make the coffee taste bad. It is important to clean the device on a regular basis to get the best taste of the coffee. After preparing the coffee, if you leave the device uncleaned and unattended for a long time, the water trapped in and around will produce bacteria, which wouldn’t be good.
Besides, cleaning also help to extend the lifespan of the device while shortening the time of brewing. Especially, if you use hard water for the coffee, there are high chances of calcium deposits and buildups inside the machine. This can eventually malfunction the device while also making the coffee taste bad. Giving a deep clean or descaling once in a while is essential to prevent the buildup.
Finally, you might not want your expensive coffee maker to malfunction after a few days. That’s why you need to keep it clean. These are some of the main reasons why you need to keep the coffee cleaner in good shape for a long time.
How to Clean My Black and Decker Coffee Maker
As we said earlier, there are several models of the Black and Decker Coffee Maker. The below cleaning guide should work for most of the coffee maker devices from the Black and Decker brand. You will find regular cleaning and deep cleaning procedure for the coffee makers. Let’s see how to perform the cleaning.
Regular Cleaning
Regular cleaning is essential to keep the coffee maker in a good shape for a long time. The cleaning procedure consist of easy and quick steps. Before you begin the cleaning, make sure that the device unplugged. Also, make sure that the device is properly cooled before you start. Then follow the below steps:
- Start with removing the filter basket. Do this carefully by holding the integrated handle and pulling out.
- The next thing you need to do is to discard the paper filter with the grounds in it.
- You can clean the carafe and the filter basket in a dishwasher’s top-rack. If there is no dishwasher available, you can simply use hand clean with warm and sudsy water.
- Now you need to clean the exterior and keep hot carafe plat. Simply wipe the area with soft damp cloth gently. Make sure that you are not using abrasive cleaner or scouring pads.
Cautions:
Here are some things you need to be aware of while cleaning:
- Never allow control panel of the device to come in touch with the water. It may cause permanent damage and make the device unusable.
- Don’t heat the carafe empty and never allow all the liquid to evaporate from the carafe while on the “Keep Hot”.
- Don’t use abrasive sponge or scouring pads or cleaner on the carafe as they can weaken and scratch the glass.
- Discard the carafe if you find any sign of damage on it. Things like crack or chip can lead to breakage.
- Keep the carafe away from hot things like electric burner, heated oven, or microwave.
Deep Cleaning with Vinegar
Once in a while, you need to offer a deep cleaning to the coffee maker. That is because the mineral deposits from water can clog the device. If you are often encountering issues like excessive steaming or prolonged brewing cycle, then it is important to deep clean the machine. Besides, a deep cleaning is recommended per 60 brewing cycles.
- Begin with filling the carafe with half vinegar and half water.
- Then insert a clean filter in the filter basket and press the ON/OFF button. This will start a brewing cycle.
- Now allow the carafe to be filled halfway and then turn off the device.
- Now leave the carafe and the coffee maker to soak around 15 minutes. After that, turn on the device to complete the cycle.
- Once you are done, eliminate the vinegar water solution from the carafe and reservoir.
- After that, pour clean water inside the device for another brew and run a cycle. This will help to clear the remaining vinegar solution from the device.
This should remove the remaining vinegar. If you still find the smell of vinegar, you can repeat the clean water cycle for a few times to complete erase it.
Using the Self-Cleaning Feature
If your Black and Decker Coffee Maker arrives with the self-cleaning feature, you don’t need to go through the deep cleaning with vinegar method. The auto cleaning method is designed to remove the calcium deposits from the hard water easily. Machines with this feature also include a warning system that let you know when to clean. Typically, you need to clean the calcium buildup once within 60 brews.
The auto cleaning method requires filling half of water reservoir with water and half with vinegar. After then, you need to place a paper basket filter and close the lid and position on the empty carafe on carafe plate. Pressing the auto cleaning option for 5 seconds will begin the cleaning. It will require around 60 minutes to complete the process.
Make sure to brew with clean water to rinse off the remaining vinegar after discarding the solution. Also, clean the removable part of the device. This will help to get rid of the vinegar smell.
Conclusion
Investing for a Black and Decker Coffee Maker coffee maker can be a great way to enjoy a perfect cup of coffee every time. It is important to clean the device in the correct way to get a long-term performance form it. We hope this article will help you to keep your Black and Decker Coffee Maker in the perfect shape for a long time.


